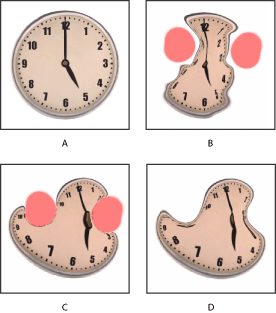
Reconstructing distortions
After you distort the preview image, you can use a variety of controls and reconstruction modes to reverse changes or redo the changes in new ways. Reconstruction modes include reverting to the original state, extending distortions in frozen areas into unfrozen areas, and repeating distortions sampled from a starting point.
To restore a preview image to a previous state:
- To change one or more unfrozen areas back to their state when you opened the Liquify dialog box, choose Revert from the Mode menu in the Reconstruction section of the dialog box. Then select the reconstruct tool
 , and hold down the mouse button or drag over the areas. The restoration occurs more quickly at the brush center.
 - To change all unfrozen areas back to their state when you opened the Liquify dialog box, choose Revert from the Mode menu in the Reconstruction section of the dialog box, and click Reconstruct.
- To restore the entire preview image to its state when you opened the dialog box, click Revert in the Reconstruction section of the dialog box.
After distorting the preview image, do one of the following:
To extend distortions in frozen areas into unfrozen areas:
- Freeze part of the areas you have changed. (For reconstruction, the image borders are also treated as if they are frozen.)
- Choose one of these reconstruction modes from the Mode menu in the Reconstruction section of the dialog box:
- Rigid to maintain right angles in the pixel grid (as shown by the mesh) at the edges between frozen and unfrozen areas, sometimes producing near-discontinuities at the edges. This restores the unfrozen areas to something close to their original appearance. (To restore their original appearance, use Revert reconstruction mode.)
- Stiff acts like a weak magnetic field. At the edges between frozen and unfrozen areas, the unfrozen areas continue the distortions in the frozen areas. As the distance from frozen areas increases, the distortions lessen.
- Smooth to propagate the distortions in frozen areas throughout unfrozen areas, with smoothly continuous distortions.
- Loose to produce effects similar to Smooth, with even greater continuity between distortions in frozen and unfrozen areas.
- Do one of the following:
- To reconstruct one or more unfrozen areas, select the reconstruct tool , and hold down the mouse button or drag over the area. Pixels move more quickly at the brush center. Shift-click to reconstruct in a straight line between the current point and the previous point that you clicked or Shift-clicked.
- To reconstruct all unfrozen areas, click Reconstruct. The image changes until reconstruction in the current mode is complete. To partially reconstruct the unfrozen areas, press Esc or press Command+period (Mac OS) during reconstruction.
To reconstruct areas to match distortions from the image location where the mouse button is initially pressed:
- After distorting the preview image, choose one of these reconstruction modes from the Mode menu in the Reconstruction section of the dialog box:
- Displace to reconstruct unfrozen areas to match the displacement at the starting point for the reconstruction. You can use Displace to move all or part of the preview image to a different location.
- Amplitwist to reconstruct unfrozen areas to match the displacement, rotation, and overall scaling that exist at the starting point.
- Affine to reconstruct unfrozen areas to match all local distortions that exist at the starting point, including displacement, rotation, horizontal and vertical scaling, and skew.
- Select the reconstruct tool , and in the preview image, hold down the mouse button or drag from a starting point.
This spreads the distortion sampled at the starting point. (If there is no distortion, the effect is the same as using Revert mode.) Pixels move more quickly at the brush center. You can set new starting points and use the reconstruct tool repeatedly to create a variety of effects.
Note: The Reconstruct button is not available in Displace, Amplitwist, and Affine reconstruction modes.