Creating textured brushes (Photoshop)
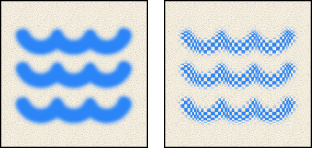
A textured brush uses a pattern to make strokes look like they are painted on textured canvas.
To edit texture options for a brush:
- In the Brushes palette, select Texture on the left side of the palette. Be sure to click the name, rather than the check box, to select the item.
- Click the pattern sample, and select a pattern from the pop-up palette.
- Set one or more of the following options:
- Off to not control the depth variance of brush marks.
- Fade to fade from the Depth Jitter percentage to the Minimum Depth percentage in the specified number of steps.
- Pen Pressure, Pen Tilt, or Stylus Wheel to vary the depth based on the pen pressure, pen tilt, or position of the pen thumbwheel.
Invert
Inverts the high and low points in the texture based on the tones in the pattern. When Invert is selected, the lightest areas in the pattern are the low points in the texture and therefore receive the least paint; the darkest areas in the pattern are the high points in the texture and therefore receive the most paint. When Invert is deselected, the lightest areas in the pattern receive the most paint; the darkest areas in the pattern receive the least paint.
Scale
Specifies the scale of the pattern. Type a number, or use the slider to enter a value that is a percentage of the pattern size.
Texture Each Tip
Specifies whether or not to render each tip individually as it is painted. When this option is not selected, the Depth variance options are not available.
Mode
Specifies the blending mode used to combine the brush and the pattern. (See Selecting a blending mode.)
Depth
Specifies how deep the paint penetrates into the texture. Type a number, or use the slider to enter a value. At 100%, the low points in the texture do not receive any paint. At 0%, all points in the texture receive the same amount of paint, therefore hiding the pattern.
Minimum Depth
Specifies the minimum depth paint can penetrate when Depth Control is set to Fade, Pen Pressure, Pen Tilt, or Stylus Wheel and Texture Each Tip is selected.
Depth Jitter and Control
Specifies how the depth varies when Texture Each Tip is selected. For more information, see About brush dynamics (Photoshop).
To specify the maximum percentage of jitter, type a number or use the slider to enter a value. To specify how you want to control the depth variance of brush marks, choose an option from the Control pop-up menu: