Home
Sony Movie Shaker Manual
What you can do with MovieShaker
Starting and exiting MovieShaker
Getting familiar with MovieShaker (Normal Mode)
Collecting clips from files
Getting familiar with the Clip tray
To collect a clip from files
Collecting clips from DV devices
Configuring your computer for use with DV devices (Be sure to read this.)
When the operating system on your computer is Windows XP
When the operating system on your computer is Windows 2000
When the operating system on your computer is Windows Me
Getting familiar with the Capture tray
Settings for capturing from DV devices
Limitations and notes for capturing from or exporting to DV devices
Capturing images from DV devices
Collecting clips from MICROMV devices
Configuring your computer for use with MICROMV devices (Be sure to read this.)
When the operating system on your computer is Windows XP
When the operating system on your computer is Windows 2000
When the operating system on your computer is Windows Me
Getting familiar with the Capture tray/Index tray
Settings for capturing from MICROMV devices
Limitations and notes for capturing from or exporting to MICROMV devices
Capturing images from MICROMV devices
To capture multiple images (Batch Capture)
To capture an image while playing it back
To capture all images that have an index and arrange them on the Product tray (Dubbing)
Placing clips to make a movie
To place a clip on the Storyboard
Getting familiar with the Storyboard
To place a clip (on the Storyboard)
To place a clip on the Timeline
Getting familiar with the Timeline
To place a clip (on the Timeline)
To edit on the Timeline
To place a transition effect between scenes
Getting familiar with the Transition tray
To place a transition effect between scenes
To insert a narration into a movie
Getting familiar with the Narration tray
To insert a narration into a movie
Editing effects, etc.
Getting familiar with the Edit tray
To select a scene for processing
To cut unwanted parts off a scene
To create a still image from a scene
Applying effects to a scene
Getting familiar with the Effect tray
Getting familiar with the Text tray
To apply effects to a scene
To apply text effects to a scene
To change the volume or playback speed of a scene
To make a shaken scene with collected clips
Getting familiar with the Shake tray
To make a shaken scene with collected clips
To save/export a final movie product
To preview a final movie product
To save/export a final movie product
Exporting a final movie product to a DV device
Uploading a final movie product to ImageStation
Getting familiar with the Image Uploader window
Uploading a final movie product to ImageStation
Exporting a final movie product to a MICROMV device
To make a shaken scene with movie files (Shake Mode)
Getting familiar with the Shake Mode
To make a shaken scene with movie files
Menu reference
Pop up menu
Additional information
To save the interim contents in a project file
To use a MICROMV device
Limitations and notes
Settings for virtual memory
Troubleshooting
Glossary
Trademark Information

What you can do with MovieShaker

MovieShaker allows you to create your own movie easily by arranging files such as movie, still image, and sound files.

You can capture and import images from a DV device (digital video camera recorder, etc.) or MICROMV device connected to your computer to create a movie.

Note

You cannot use a MICROMV device with MovieShaker preinstalled on your computer. If you wish to use a MICROMV device, see To use a MICROMV device.

Workflow

The following is the overview of the MovieShaker workflow.

  1. Collect clips.

    Collect movie, still image, and sound files for clips, and place them onto the Clip tray

    You can also capture images directly from the DV device or MICROMV device connected to your computer, and import them into the Clip tray.

  2. Create a movie.

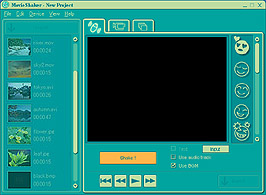
    MovieShaker has the Shake Mode and the Normal Mode.

    • Shake Mode

    • The Shake Mode allows you to export automatically edited clips of approximately 30 seconds long. Effective scenes can easily be created using this tool.

    •  

    •  

    • Creating your movie using the Shake Mode:

    • You can create a movie of approximately 30 seconds long, by using clips on the Clip tray at random, simply by clicking a button. The movie is automatically created, and may have special effects in addition to those on the Effect tray.

      Note

      In the Shake Mode, the Index tray is not displayed on the Tool panel. You can capture an image recorded on the videotape of the MICROMV device while playing it back in this mode, however, you cannot use the "Scan," "Batch Capture," and "Dubbing" functions.

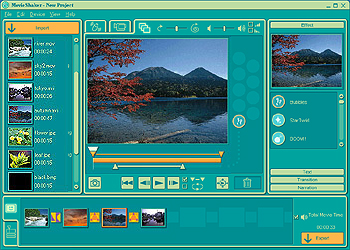
    • Normal Mode

    • The Normal Mode allows you to perform various types of editing using clips. You can select clips from the Clip tray and place them onto the Product tray (the placed clips are called "scenes"), and insert transition effects between the scenes, or add BGM and/or narrations to the scenes. You can also display a scene on the Edit tray monitor to select only the parts of the scene you want to use, or apply various effects to it. In addition, you can export a shaken (automatically edited) scene to a file as a final movie product.

    •  

    •  

    • Creating your movie using the Normal Mode:

    • Placing clips to make a movie

    • Select clips from the Clip tray and place them onto the Product tray to create a movie. You can add an effect, such as a cross-fade or wipe effect, between scenes on the Product tray to provide an interesting transition from one scene to another. You can also insert your own narration.

    • On the Product tray, you will find the Storyboard Display and the Timeline Display.

    • Editing effects, etc.

    • Select a scene from the Product tray to display it on the Edit tray. You can cut off unwanted parts (trimming) or apply effects provided with MovieShaker to the scene.

    • Now you can enjoy your own movie on the MovieShaker monitor.

  3. Save/Export a final movie product

    You can export your movie (final movie product) to a file or to a DV device or MICROMV device, so that it can be shown or distributed to other people.


top of page
©1996/2024